|
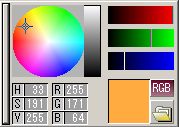
You can change the "thickness" value and "density" value by dragging the bars located to the right of "t" and "d" an the upper middle. T value is "thickness" of the color. |
|
On the left are samples with T value and D value changed. Please note that T and D value also influence other editing results such as filters, paste, and filling with color, etc. Therefore it is important to change the values back to 100% after making each effect, or you will be surprised to see unexpected results. |
|
You may think that it is annoying that the T and D values give influence
to other editing works, but it can give interesting effects. Regular (left) As you can see, the same filter gets different results. |
|
Let's start using filters. Choose a category from the pull-down menu at the top, and then choose a filter in the middle window.. |
|
Homepage background textures can be made using various filters like the samples.. I love making textures, and recently I may be spending more time making
textures than drawing pictures.. There are a lot of user-made filters available, but unfortunately most of them are Japanese language versions, and have not been translated to English yet. Yet still, you can find some English filter pages linked from the official Pixia website. |
|
The folder icon at the lower right of the C-panel is a parts box. You can use the pictures in the box as "pens". Click the icon and choose "parts box" in the opened menu. |
|
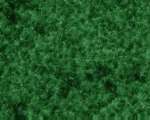
Here is the list of pictures in the parts box. Let's use "grass" as a sample. You can register your own pictures in this partsbox for future use. |
|
When the dialog that asks "Use the image as tip of pen?" opens, click "OK", and then stamp the "grass" image like the sample. The right one is made by dragging the image. |

|
Here is the image I made using various pentips, changing T and D values and using some images in the parts box. Got it? |