 |
|
|---|---|
 |
38.
The area other than the text is selected. Click "Selection" - "Convert to New Layer" to add a new layer that has the same text on the transparent background. |
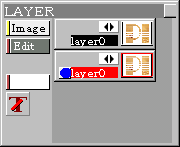 |
39.
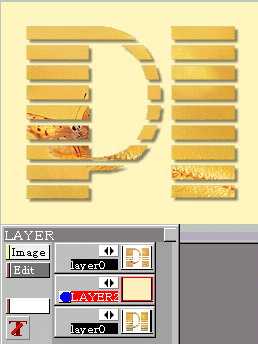
Click "Deselect" icon in the tool bar to release the selection. Click the added layer in L-panel to activate it. The layer is highlighted in red. |
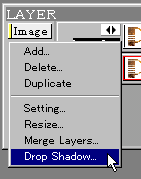 |
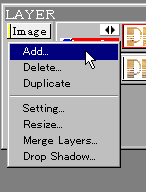
40. Click "Edit"button in L-panel, and choose "Drop Shadow". |
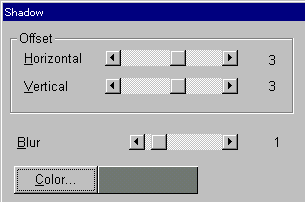 |
41. In the dialog, set the distance of "Offset"and "Blur", choose the color of the shadow, and click "OK" button. |
 |
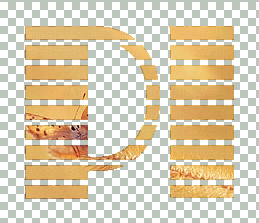
42. Now the drop shadow is added! |
 |
43.
If you would like to make the background color same as the one on your
webpage, add another layer for the background. Click the thumbnail picture of the layer that is located at the top of theL-panel. Click "Edit" button and choose "Add". |
 |
44. A new layer is added. |
 |
45.
Choose or make the color of your webpage background, and click "Fill"
icon in the tool bar. The layer is filled with the color. |
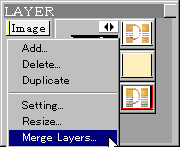 |
46.
Let's merge all the layers. Click "Edit" button in L-panel, and choose "Merge Layers..." |
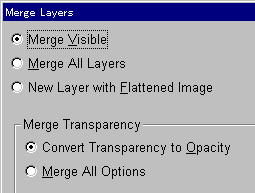 |
47.
Choose "Merge Visible" and click "OK". You will get the merged image in the new canvas, and save it in PNG or JPG. Keep the original picture before merging layers in "PXA" format as the original source. You will be able to alter the color of the background color when you change the background of your webpage. Your line logo is finally done! |
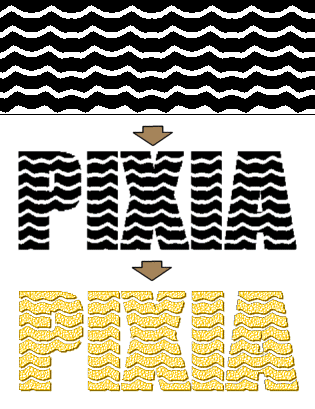 |
Advanced
Tip If you alter the stripe pattern using a filter, you will get a logo with an interesting effect as the sample here. |