 |
|
|---|---|
 |
|
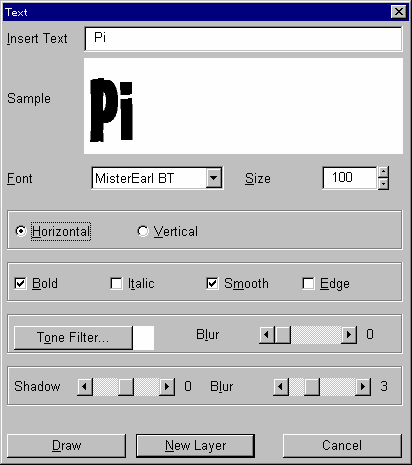
| 1.
Open a new canvas with an appropriate size by clicking the "New"
icon in the tool bar (or "File" - "New" from
the top menu). 2. Choose Black in the P-panel. 3. Click "Text" icon in the tool bar (or "Paint" - "Text" from the top menu), set the font type, color and size in the "Text" dialog, type words you would like to use in "Sample" box, and click "Draw" button. |
|
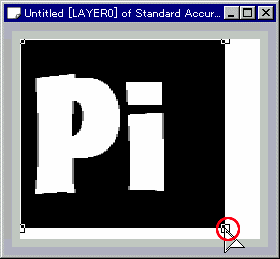 |
4. Now you see the text in the canvas with black and white reversed. You can change its size by dragging the handles at the four corners. Also you can move the text by dragging anywhere inside the rectangle. |
 |
5. Right-click the text and choose "Paste" from the context menu that popped up. |
 |
Here is how it looks after pasting the text. |
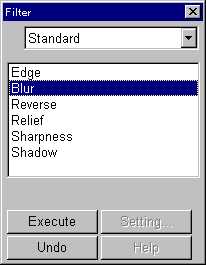 |
6. Apply "Blur" from the "Standard" filter set, five times. |
 |
Here is the result after blur is applied. |
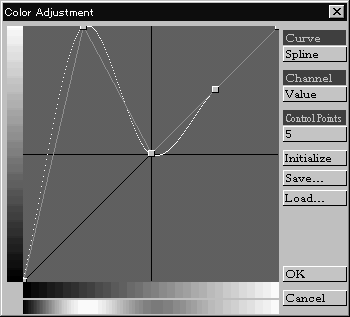 |
7.
Click "Image" - "Color Adjustment"
from the top menu. Set "Curve" to "Spline", and drag to maximum the point second from the left as shown in the picture here. This reverses the middle part of the blur gradation. Click "OK" to apply the adjustment. |
 |
8.
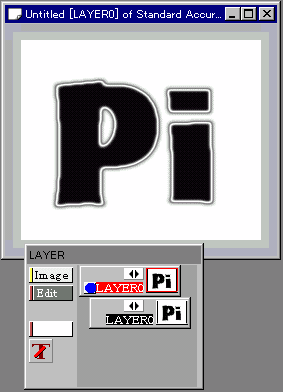
This is the result of the color adjustment. 9. Make a duplicate of this layer by clicking "Edit" button in the L-panel and then "Duplicate" in the pop-up menu. 10. Temporarily make the duplicate layer invisible by clicking the icon with the picture of two triangles pointing the opposite sides, which is the button to change the layer between visible and invisible modes. Click the button and the layer slides to the right position. Now this layer is invisible. 11. Let's go back to the original layer. Click the thumbnail picture of the original layer. The frame of the thumbnail and layer name will become red, which indicates it is the now the current layer that you are working on. (Refer to the picture left.) |
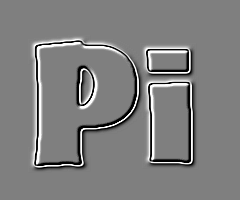 |
12.
We will work on the original layer. Apply "Relief" once in the "Standard" filter set. Have you got the result like the picture left? |
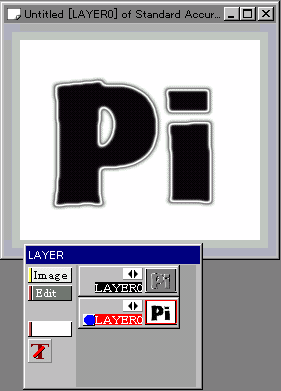 |
13.
Now let's go back to the duplicate layer by clicking the thumbnail picture
of that layer in L-panel. Now click the triangle icon to change the layer setting back to visible. |
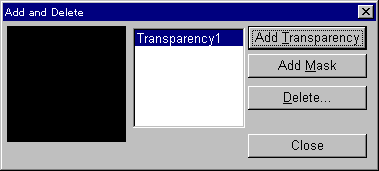 |
14.
Click the "Image" button in L^panel, and choose "Add
and delete..." from the pop-up. Click "Add Transparency" button in the dialog that appeared, and a transparency plane will be added. |
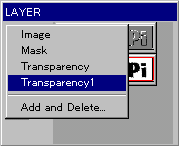 |
Let's click "Image" button again and confirm the transparency plane is now listed in the menu. |
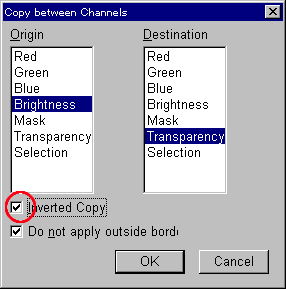 |
15.
Click "Image" in the top menu (NOT L-panel) and then choose
"Copy between Channels". Choose "Brightness" in "Origin", and "Transparency" in "Destination" in the dialog as shown left. Make sure you check "Inverted Copy" option, and click "OK". This makes all colors transparent except complete white ("#FFFFFF"), and now you can see the buttom layer through this layer. *Another method: Choose "Mask" in "Destination" box in the "Copy between Channels" dialog, "Fill" the layer with "Eraser" (click "Eraser" icon first, and then click "Fill" icon), and click "Image" - "Initialize Mask..." from the top menu, and you will get the same result. |
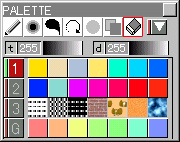 |
"Eraser"
icon is located in the P-panel. (The red framed icon in the picture
left.), and "Fill" icon is in the Tool Bar. (The picture left shows, from the left, "P-panel", "Fill" icon, and "SeedFill" icon.) |
 |
16.
This is how it should look so far. If you have used "Another method", make sure to click the "Pen" icon in P-panel to change the drawing mode back to "Pen". |
 |
17.
Check P-panel to make sure that the duplicate layer is "current"
now. If not, click the thumbnail picture of the layer to make it current.
Let's make it accustomed to check regularly which layer you are working
on. Otherwise, you might end up making unwanted modifications to wrong
layers. Click "Image" in the top menu, and choose "Negative". Now you got the base image. Proceed to the next page. |