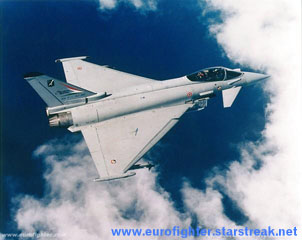
Eurofighter Typhoon is designed and built as a collaborative project in the UK, Germany, Italy and Spain. The Eurofighter programme was initiated in 1970s. Demonstrator, the Experimental Aircraft Program (EAP) take a first flight in mid-1986. The first two Development Aircraft (referred to as DAs) had started construction in Germany and Britain. DA1 was the first to fly on the 27th March 1994. Typhoon has low set canard-delta wing with a single fin powered by twin engines fed via an intake mounted in the ventral position. The advanced flight control system and pitch unstable design impart great manoeuvrability at high and low speeds. (Of course, Paper Typhoon does not have flight control system nor pitch unstability.) First deliveries to each nations evaluation/integration centres was put at December 2001 for Britain and early 2002 for the others. Final order numbers were set at; 232 (37.5%) to Britain, 180 (29%) to Germany, 121 (19.5%) to Italy and 87 (14%) to Spain. Greece chooses Eurofighter with the intention to purchase between 60 and 90 fighters.
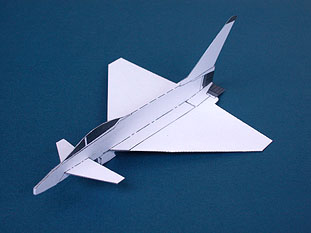
How to manufacture Typhoon
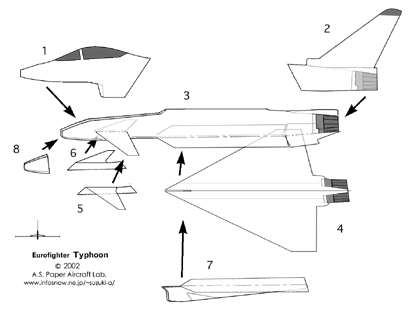
Download the drawing and print it on thick paper. (Refer to Material
and Instrument.) Set up your printer for thick paper.
Cut the paper according to the thick line. Start with body of plane.
Fold up as dash and dot line " _ . _ . _" , and fold down as dash line
" - - - - " . At first make cockpit 1 and vertical tail fin 2. After folding
the body, open and cover back side of plane in paste or glue, paste cockpit
and vertical tail fin inside the body and re-fold. Paste main wings 4 under
the body. Dihedral angle of main wings is 0 degree. Paste parts 5 and 6
(reinforcing the canard parts) under the canards ( small front wings) near
cockpit. Anhedral angle of canards is 10 degree. Paste air intake of engine
7 under the main wings. (Adjust the front edge of air intake to thin line
on the cockpit parts.) Cut out the catapulting hook. Paste nose cover 8
at nose of body.
Adjustment
Bend down front edge of main wings slightly as a bow shape to make
camber. Bend up rear end of main wings slightly. Form washout (decrease
angle of incidence at wing tip) at the tip of main wings slightly. Spray
clear paint thinly if fly outdoor.