Step 3: Area Selection
![]()
![]()
![]()
Step 3: Area Selection
![]()
![]()
![]()
|
|
|
Selection icon group
|
| Using selections, you can copy, fill or draw in the selected
area. Here, I would like to introduce some technique using selections. First let's start from the basic usage. |
|
|
|
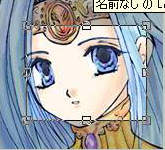
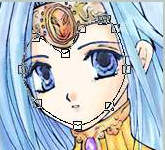
Drag and make a rectangular area of your choice. You can change the size
of the selected area by dragging the tiny squares on the lines and at
the corners. You can move the area by dragging the inside area. | |
|
|
|
| Drag and make a straight line. You can move the line by dragging the line. This selection is for drawing a straight line. You cannot fill in the area. (There is no area to fill, to begin with...) | |
|
|
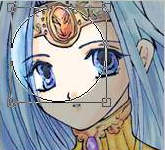
| Drag and make a circle area. Drag the tiny squares at the corners of the lectangle that fits outside the circle, and you can change the size of the circle. Dragging with [SHIFT] key down makes a complete circle. | |
|
|
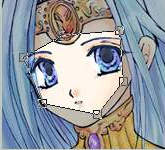
| Click, click, click, and you can make a polygonally selected area. Right clicking completes the selection. Drag the tiny squares at the corners and you can change the shape and size, and drag the inside of the selected area, and you can move the area. | |
|
|
| Keep on clicking to make continuous straight lines. Right click means the end of it but it does not make a closed area. Consequently, you cannot fill the area with color. | |
|
|
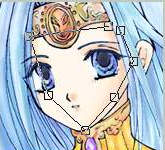
| Keep on clicking to make a continuous line but this time a curved line. You can make a smooth curve that goes along the clicked points. Just like Continuous Straight Lines, you cannot fill the area with color, since the area is not closed. | |
|
|
| Drag and the line will stick to a line edge of the picture. Release the mouse button and the line will end. This makes a closed area. You can change the shape by dragging the tiny squares, and you can move the area by dragging the inside of the area. | |

|
|
|
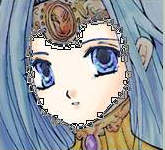
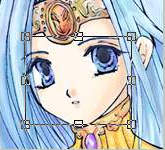
Click and it will make a selection of the same or similar color in the
neighborhood. Here I clicked the center of the face and the skin color
is selected. You can change the setting of this function by the O-panel. | |
|
Cancel selection. |
|
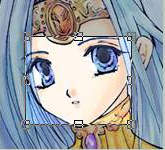
This is to distinguish the selected area from non-selection area. This is the default setting: "Darken" outside. |
|
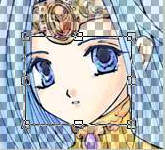
This is "Check." You can choose whichever you like, "Darken" or "Check." |
|
This is "Hide." This might be the setting that bothers you the least, but only the selection lines are your clue now. When you choose this setting, remember to cancel the selection when
you work is done. |
