

SIP CommunicatorでSIPアプリケーションを構築する
SIP Communicator
SIP Communicatorを用いてP2P通信アプリケーションを構築します。
SIP CommunicatorはNISTが提供するJavaクライアントアプリケーションです。このアプリケーションは、ネットワーク上のマシンと双方向音声、映像配信を行うことができます。通信の開始や終了など通信制御にJAIN SIPを用い、音声や映像の操作はJMFを使用しています。
 ネットワーク構成
JDKのインストール
JDKをインストールします。
●ダウンロード
Java SE Downloads
http://java.sun.com/javase/ja/6/download.html
JDK 6 Update 10
●インストール
jdk-6u10-windows-i586-p.exe
をダブルクリックしインストールします。
<ドキュメント>
Java SE 6 ドキュメント
http://java.sun.com/javase/ja/6/download.html
jdk-6-doc-ja.zip
SIP Communicatorのダウンロード
OSに応じたSIP Communicatorのバイナリをダウンロードします。
SIP Communicatorのダウンロードサイト
http://sip-communicator.org/
sip-communicator-1.0-alpha3-nightly.build.*.exe
SIP Communicatorのインストール
sip-communicator-1.0-alpha3-nightly.build.*.exe
をダブルクリックしインストールします。
SIP Communicatorの起動
起動は、
C:\Program Files\SIP Communicator\run.exe
を実行します。
ツールバーにSIP Communicatorアイコンが表示されます。
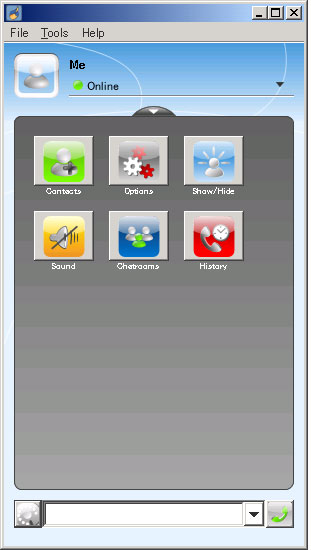
●SIP Communicator操作画面の表示
ツールバーのSIP Communicatorアイコンをクリックすると、SIP Communicator操作画面が表示されます。
設定
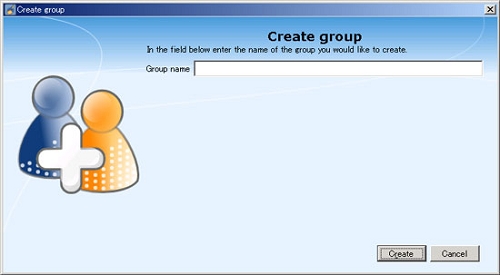
●Create group
SIP Communicator → File → Create group で Create group 設定画面を表示させます。
Group name にグループ名を入力します。
Createボタンをクリックします。
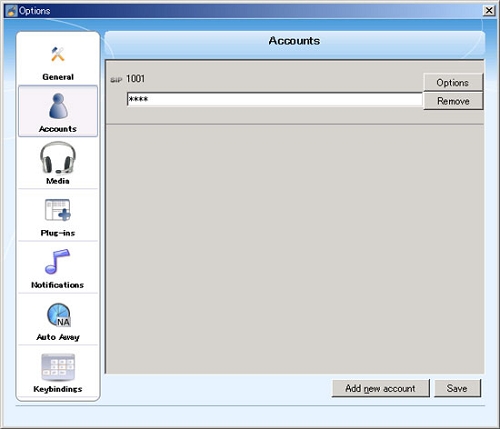
●アカウントの登録
SIP Communicator → Tools → Options → Accounts で Accounts 設定画面を表示させます。
Add new account ボタンをクリックし、Add new account 画面を表示します。
Network で SIP を選択します。
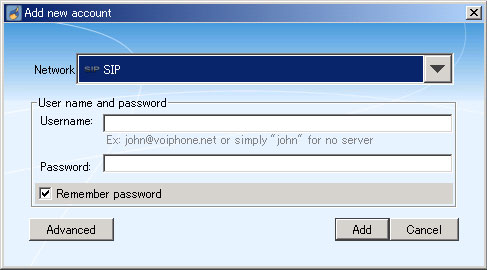
Advancedボタンを選択します。
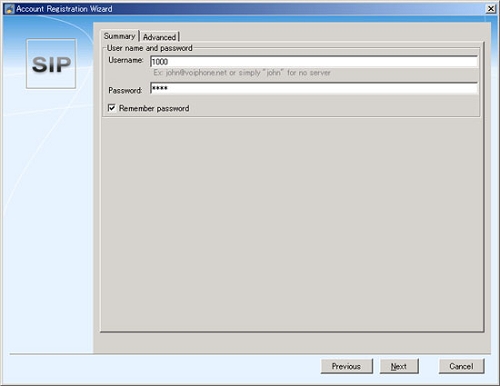
Summaryタブを選択します。
ユーザ名とパスワードを設定します。
Username ← 1000
Password ← 1000

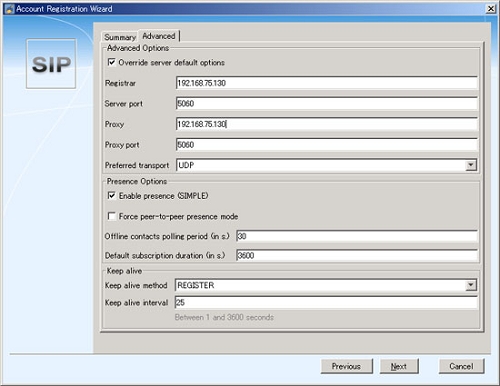
Overrice sever default options にチェックを入れます。
Register と Proxy のIPアドレスを設定します。
Register ← 192.168.75.130
Pxoxy ← 192.168.75.130
(その他項目はディフォルト設定のままとします。)
Nextボタンをクリックします。
設定サマリが表示されます。
設定の確認後、sing in ボタンをクリックします。
●アカウントの削除
SIP Communicator → Tools → Options → Accounts で Accounts 設定画面を表示させます。
削除するアカウントを選択します。
Removeボタンをクリックします。
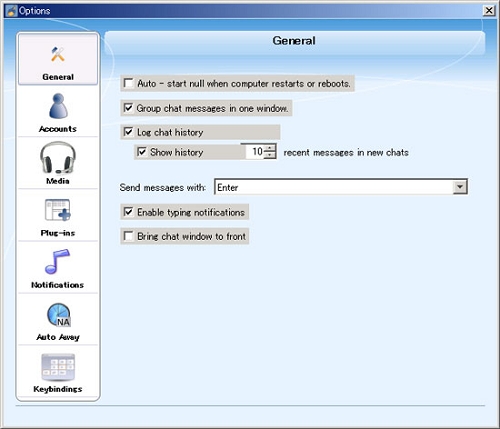
●オプション general
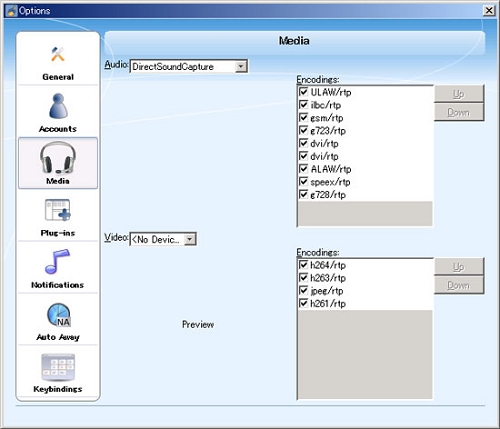
●オプション media
電話着信操作
●着信画面

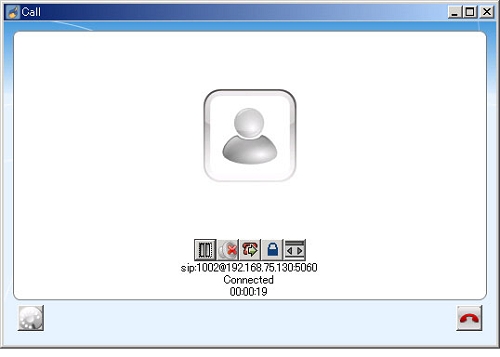
●接続画面
2008.12.13