

Vyatta on ESXi 3.5でルータを作る
ESXi 3.5環境で動作するVyatta VC6.1で簡単なルータを作ります。
Vyattaのインストール
Vyatta VC6.1をESXi 3.5 Update 3にインストールします。
 Vyatta VC6.1をESXi 3.5にインストールする
eth0の設定
Vyattaから外部にアクセスできるように設定します。
$ configure
# set system host-name vyatta.itlife.ddo.jp
# set system domain-name itlife.ddo.jp
# commit
# set interfaces ethernet eth0 address 192.168.1.123/24
# set system name-server 192.168.1.1
# set system gateway-address 192.168.1.1
# commit
# save
設定モードを終了します。
#exit
$
eth1の設定
eth1を設定します。
$ configure
# set interfaces ethernet eth1 address 192.168.2.1/24
# commit
DHCPサーバを設定します。
# set service dhcp-server shared-network-name ETH1_POOL subnet 192.168.2.0/24 start 192.168.2.100 stop 192.168.2.119
# set service dhcp-server shared-network-name ETH1_POOL subnet 192.168.2.0/24 default-router 192.168.2.1
# set service dhcp-server shared-network-name ETH1_POOL subnet 192.168.2.0/24 dns-server 192.168.1.1
# commit
NATを設定します。
# set service nat rule 2 source address 192.168.2.0/24
# set service nat rule 2 outbound-interface eth0
# set service nat rule 2 type masquerade
# commit
# save
設定を終了します。
# exit
$
動作確認
eth1へのDHCPクライアントPCの接続
eth1にDHCPクライアントPCを接続します。
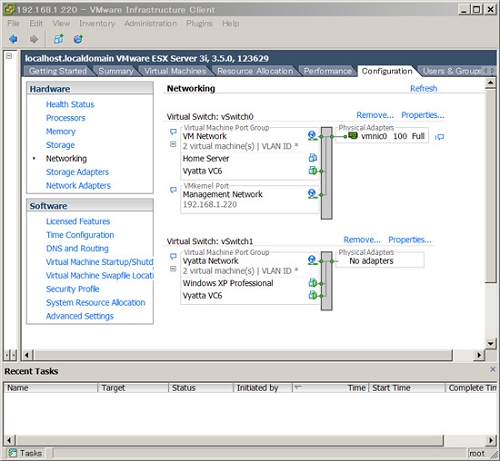
ESXi 3.5で動作しているWindows PCをVyattaのeth1に接続します。
<接続のための設定>
- ESXiのメニュー → Inventory → Virtual Machine → Edit Settingをクリックし、Virtual Machie Propertiesを開きます。
- Network Adapterを選択します。
- Network ConnectionのNetwork labelでVyatta Networkを選択します。
- OKをクリックして設定を終了します。
DHCPサーバからのIPアドレス取得
DHCPサーバからIPアドレスが取得できることを確認します。
C:\Documents and Settings\Administrator>ipconfig /release

Windows IP Configuration

Ethernet adapter Local Area Connection 2:

        Connection-specific DNS Suffix  . :
        IP Address. . . . . . . . . . . . : 0.0.0.0
        Subnet Mask . . . . . . . . . . . : 0.0.0.0
        Default Gateway . . . . . . . . . :

C:\Documents and Settings\Administrator>ipconfig /renew

Windows IP Configuration

Ethernet adapter Local Area Connection 2:

        Connection-specific DNS Suffix  . :
        IP Address. . . . . . . . . . . . : 192.168.2.100
        Subnet Mask . . . . . . . . . . . : 255.255.255.0
        Default Gateway . . . . . . . . . : 192.168.2.1

C:\Documents and Settings\Administrator>
192.168.1.0/24へのアクセス
192.168.1.0/24 にアクセスできることを確認します。
C:\Documents and Settings\Administrator>ping 192.168.1.1


Pinging 192.168.1.1 with 32 bytes of data:


Reply from 192.168.1.1: bytes=32 time=4ms TTL=63

Reply from 192.168.1.1: bytes=32 time=1ms TTL=63

Reply from 192.168.1.1: bytes=32 time=1ms TTL=63

Reply from 192.168.1.1: bytes=32 time=1ms TTL=63


Ping statistics for 192.168.1.1:

    Packets: Sent = 4, Received = 4, Lost = 0 (0% loss),

Approximate round trip times in milli-seconds:

    Minimum = 1ms, Maximum = 4ms, Average = 1ms


C:\Documents and Settings\Administrator>
インターネットへのアクセス
インターネットにアクセスできることを確認します。
C:\Documents and Settings\Administrator>ping asahi-net.or.jp

Pinging asahi-net.or.jp [202.224.39.40] with 32 bytes of data:

Reply from 202.224.39.40: bytes=32 time=13ms TTL=248
Reply from 202.224.39.40: bytes=32 time=18ms TTL=248
Reply from 202.224.39.40: bytes=32 time=14ms TTL=248
Reply from 202.224.39.40: bytes=32 time=9ms TTL=248

Ping statistics for 202.224.39.40:
    Packets: Sent = 4, Received = 4, Lost = 0 (0% loss),
Approximate round trip times in milli-seconds:
    Minimum = 9ms, Maximum = 18ms, Average = 13ms

C:\Documents and Settings\Administrator>
sshの設定
SSHでログインできるようにします。
$ configure
# set service ssh
# commit
# save
# exit
$
ウェブブラウザの設定
ウェブブラウザで外部から設定できるようにします。
$ configure
# set service https
# commit
# save
# exit
$
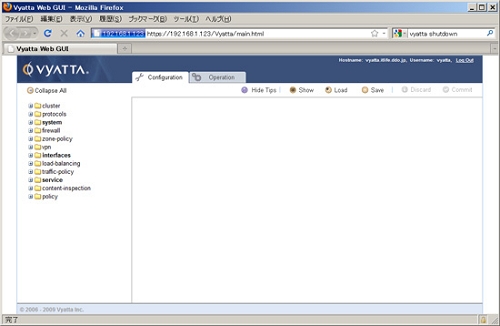
https://192.168.1.123/
使用コマンドの概要説明
- configure
- 設定の開始
- set system host-name
- ホスト名設定
- set system domain-name
- ドメイン設定
- set interfaces ethernet eth0 address
- IPアドレスとネットマスク
- set system name-server
- DNSサーバ
- set system gateway-address
- ゲートウェイサーバ
- set service dhcp-s・・・start stop
- DHCP設定アドレスの範囲
- set service dhcp-s・・・default-router
- DHCP Clientに知らせるDefault Gateway
- set service dhcp-s・・・dns-server
- DHCP Clientに知らせるDNSサーバ
- set service nat rule 241 source address
- NAT変換元
- set service nat rule 241 outbound-interface eth0
- 変換先
- set service nat rule 241 type masquerade
- マスカレード設定
- commit
- 設定の適用
- save
- 設定の保存
2010.10.03