
Berkeley EcoHouse (California, U.S.A.)
Berkeley EcoHouse is an environmentally conscious local community group who is involved in earnest and pleasant activities such as growing vegetables and flowers using compost and creating artistic works with used materials. In spring 2000, graduate students who were studying environmental design at UC Berkeley were committed construction of a tool shed in their community garden as a class project of "constructing a small urban ecology" instructed by Professors Randy Hester and David Arkin (a master architect of the project). The tool shed planned by the community, the students, and the architects contained many ideas such as a "gray" water system, a compost toilet, a living roof, walls made with environmentally friendly materials, a photovoltaic generation system and a passive solar energy system. The EcoHouse is a changing community place accumulating many neighbor's thoughts and ideas. |
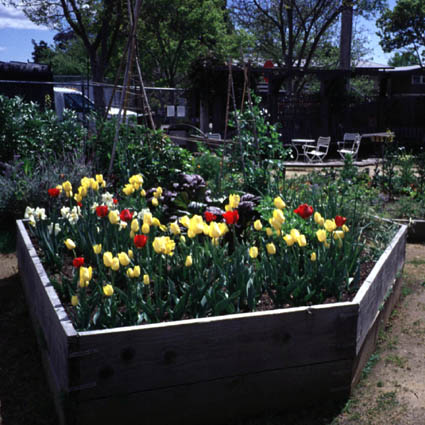 |
Karl Linn Community Garden In spring, the garden receives benefits of rain and the sun and turns itself to be joyful colors. |
||
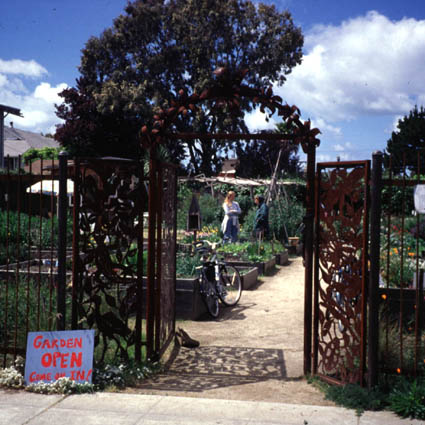 |
Peralta Community Garden The artistic iron gate welcomes people. Besides vegetables and flowers, there are many works such as a circular bench, a cob house, a pond, a sundial and so on. |
||
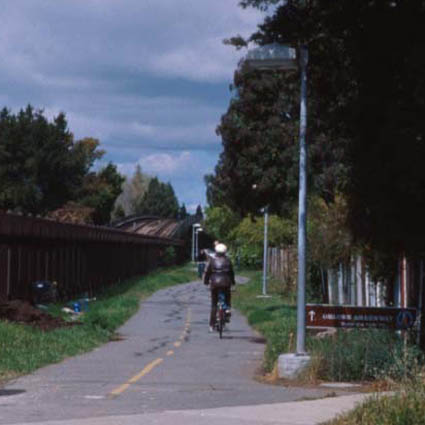 |
Ohlone Greenway A path for pedestrians and cyclists like this greenway is especially valuable in the U.S. One of the attractive characteristics is that people can diagonally cross the town. |
 Foundation and Framework
In spring 2000, after the discussion with community members, construction of the tool shed started. Some of the design principles were to reuse used or left-over materials such as concrete chunks produced during sidewalk renovation and to use environmentally friendly materials such as wood from an environmentally conscious seller. What kind of the tool shed will be? Can we really build the tool shed? I felt a mixture of expectation and anxiety at this point in time.
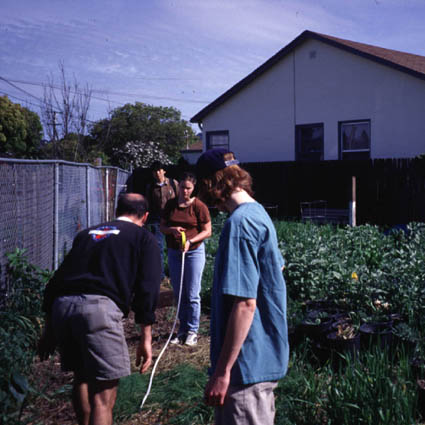 |
Marked the location of the planned tool shed using a tape measure. | ||
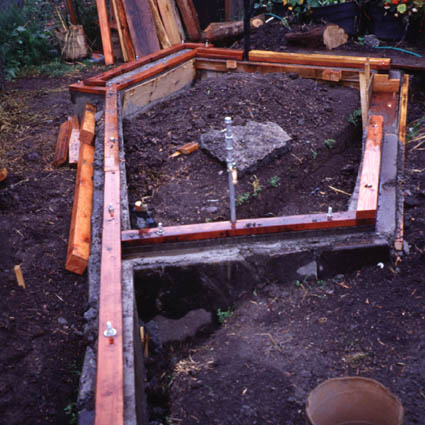 |
After trenching, we put chunks of concrete in the trenches, made frames, arranged re-bars, anchors and pipes for water and electricity and poured concrete into the trenches. | ||
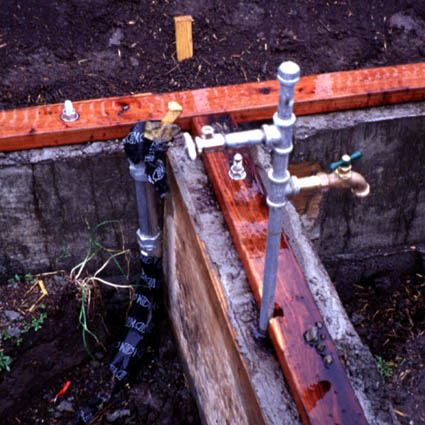 |
The pipes for water and electricity. These were installed by a qualified person and checked by the city. | ||
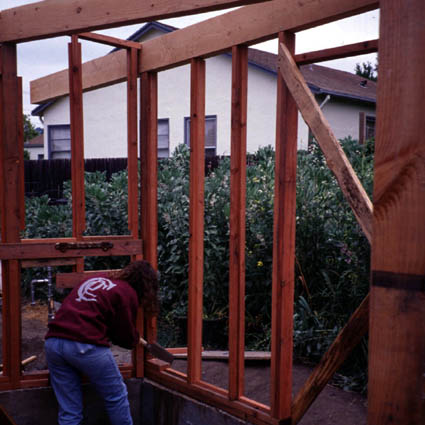 |
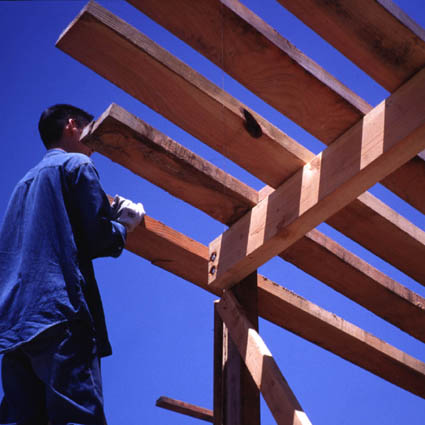
Raised pillars. It was a little difficult to handle the joints besides 90-degree corners. In addition to powered saws, a Japanese hand saw rustled! | ||
 |
Around March 2000, apple trees were planted along the street. The trees will be a green fence with flowers and fruits, called "espalier." | ||
 |
In order to realize the "living roof" that holds soil and plants, we made the roof robust. A person can stand on the roof and do maintenance such as weeding. | ||
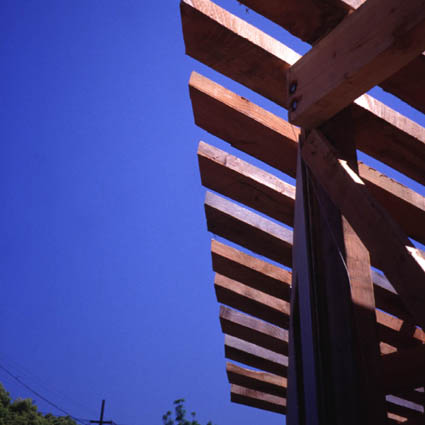 |
The edges of the roof were beautifully cut. |
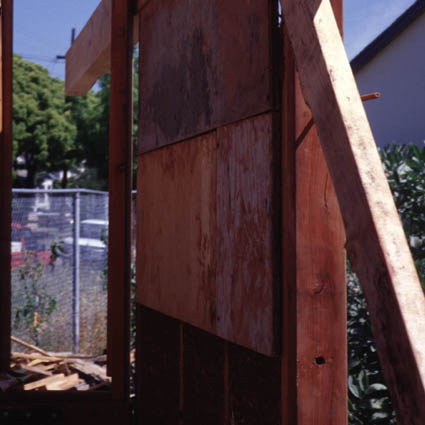
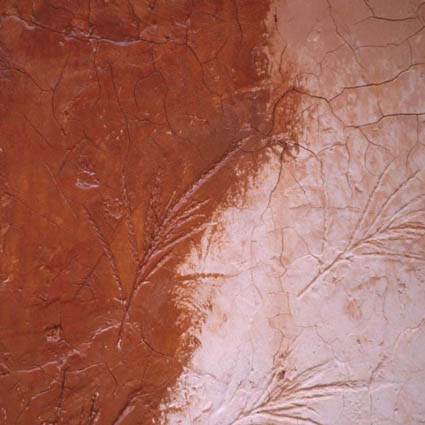
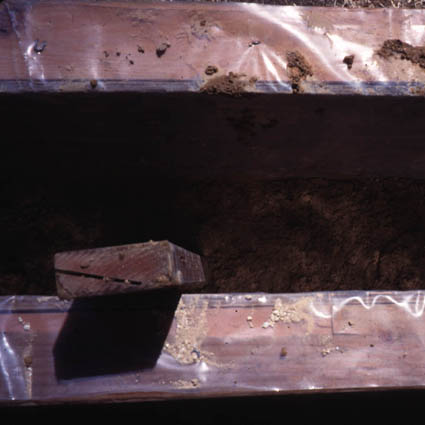
Light Clay Wall
A light clay wall is made of clay, straws, cement and water. First, we mixed clay and water and put it on cut straws. Then, stuffed the coated straws in the walls and covered the wall with mixture of clay, cement and water. Because the proportion of cement seemed not enough so that the cover came off the wall due to rain and wind, we applied a kind of varnish on the surface to protect the surface of the wall.
 |
Put bamboo sticks through the center of the pillars in order to reinforce the wall. | ||
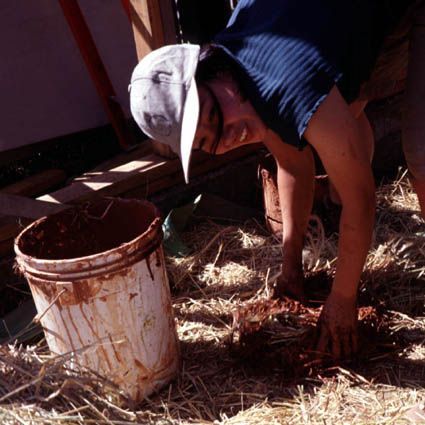 |
Mixing materials. We used beautiful reddish clay. | ||
 |
Stuffing the mixture. | ||
 |
Prepare a back board in order to pack the stuff. | ||
 |
Coat the wall after waited until the wall dried. | ||
 |
Applying a kind of varnish on the outside of the wall. | ||
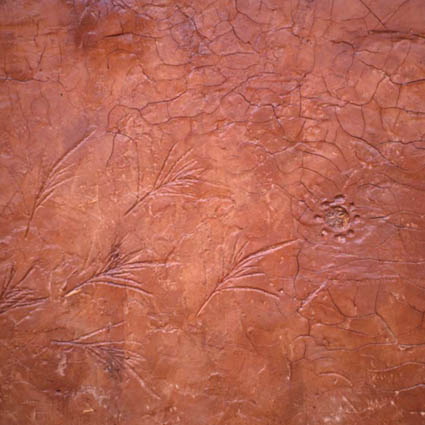 |
The dried surface looks like leather with a deep color. The intaglio of grasses added warmth of hands. |
Living Roof
The work for the living roof started from the morning and finished loading soil in the evening. The day was one of the most exciting during this project.
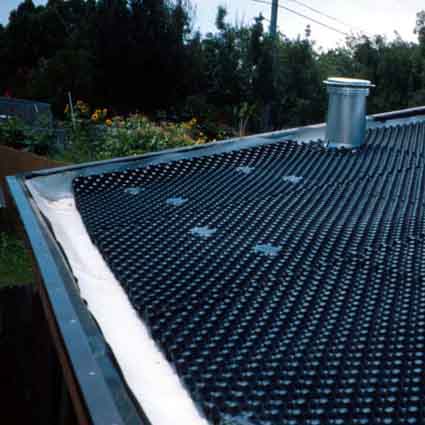 |
After preparing a bituminous coat, we put a white plastic sheet and black water-holding plastic layer. The water-holding layer stores water in the concaves and drains water from a hole of the top of convexes. | ||
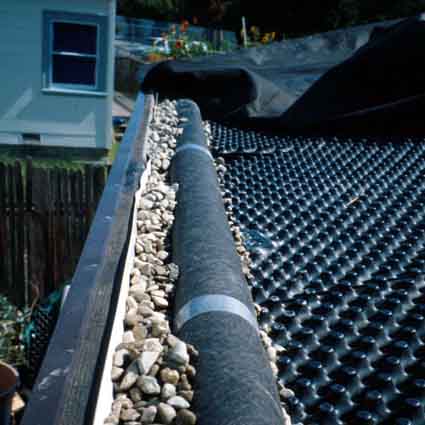 |
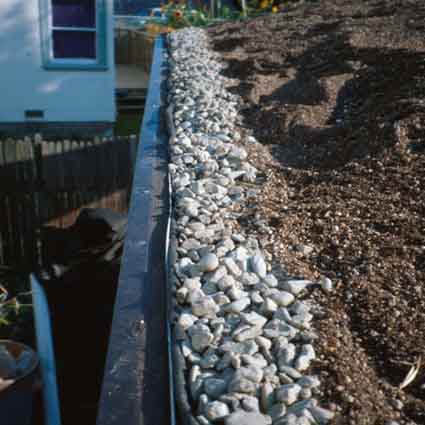
Rolled up a punched pipe with a filter fabric and placed it at the foot of the sloped roof. The pebbles are for preventing soil from washed out. | ||
 |
A layer of 5-inch (13-cm) light soil was loaded on the roof. | ||
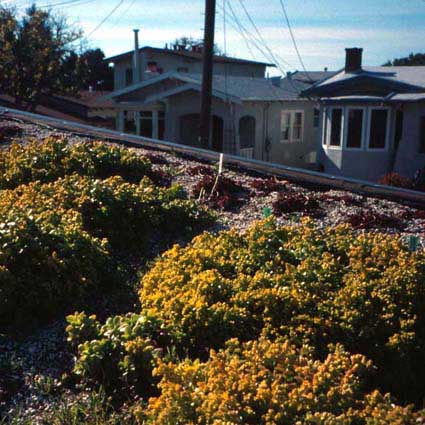 |
Four species of Sedum, which are tolerate dry condition, were planted. After a half year, one of the sedum had yellow flowers. |
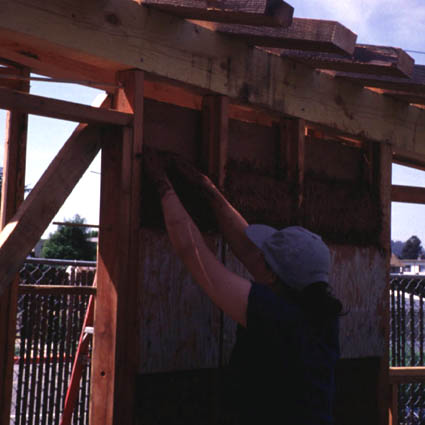
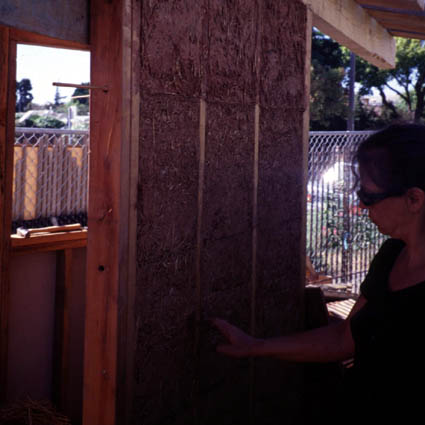
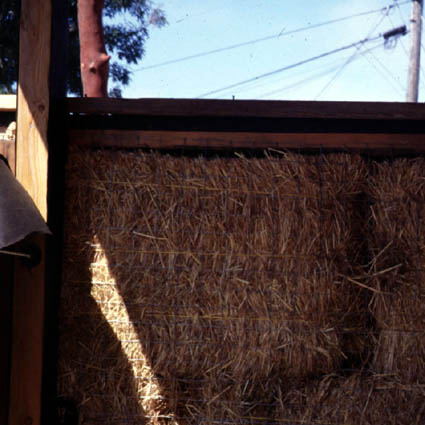
Straw Bale Wall
A straw bale wall has straw bales as inner insulation. The outside is coated with the mixture of sand (7 - 8), cement (1) and water (suitable quantity). In the case of hand-made wall, make a ball of the mixture and throw it to the wall. The proportion of water in the mixture is much greater than that of the rammed earth wall. The ball of the mixture with appropriate softness sticks to the wall and does not rebound. The work was a great fun even though we took a shower of the dirt.
 |
Stack straw bales and cover it with a wire mesh in order to keep the shape and reinforce the coating layer. | ||
 |
Mix sand (7-8), white concrete cement (1) and water as suitable. | ||
 |
Throw the mixture to the wall. Don't forget to cover adjacent surfaces with plastic sheets in order to protect it from splashes of the dirt. | ||
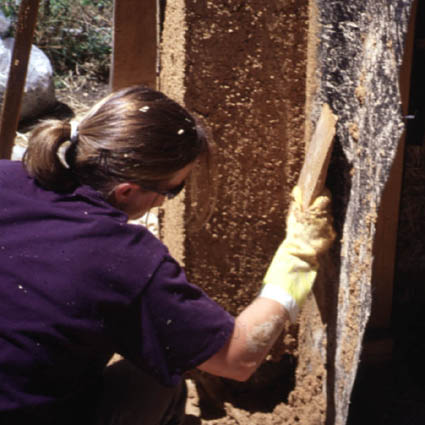 |
Make up a form with something flat. We used a hand trowels to add texture for the inner wall of the tool shed. | ||
 |
Wait until the wall dries. | ||
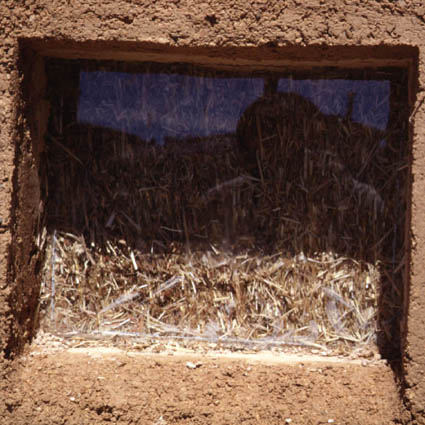 |
The inner straws can be seen from a window of the wall. |
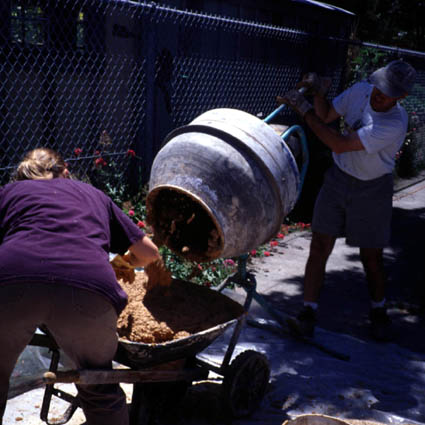
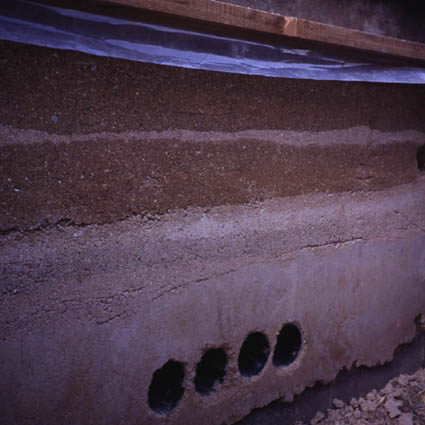
Rammed Earth Wall
Mix sand (7-8), concrete cement (1) and water (suitable quantity). Then, put it into frames, ram the mixture and wait until it dries. Success in the ramming depends on the proportion of the water in the mixture. The hardness of the mixture is appropriate if a ball of the mixture keeps the shape on a hand and splits on the ground when you drop the ball from 3-ft (1-meter) above. Ram the earth so you will know subtle difference.
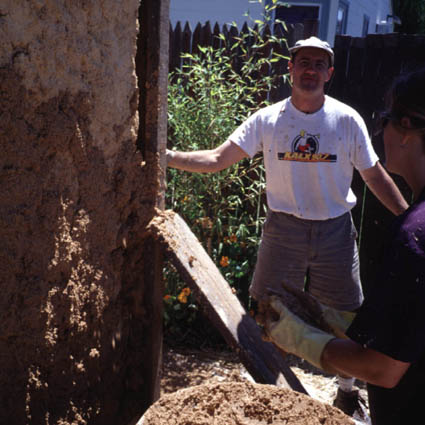
In the EcoHouse project, we used Nunn's Canyon Sand which is quarried in the local area. It is desirable to use local materials because it reduces energy for transportation and impact on the environment.
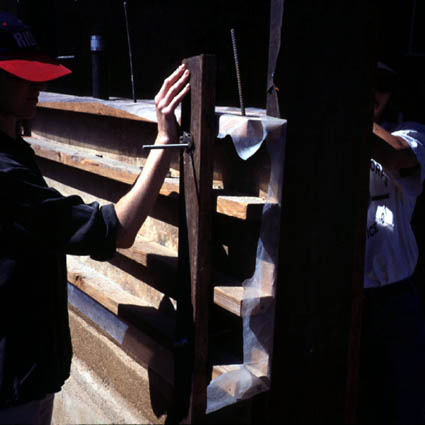 |
Install a frame. It should be robust enough to ram. | ||
 |
Ram the earth using sticks. Cover the frame with plastic sheets for easy removal of the frame after the wall dries. | ||
 |
Move the frame up in order to completely dry the lower wall and build the upper portion of the wall. | ||
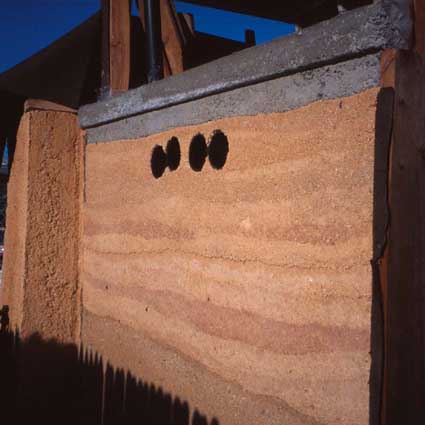 |
Taking 3 to 4 persons a week, the wall finished after one-and-a-half-month work. The white and/or gray cement plus sometimes red clay in the mixture created beautiful layers. It looks like a hand-made sediment rock. | ||
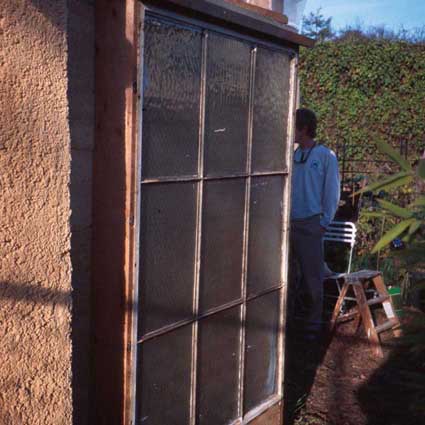 |
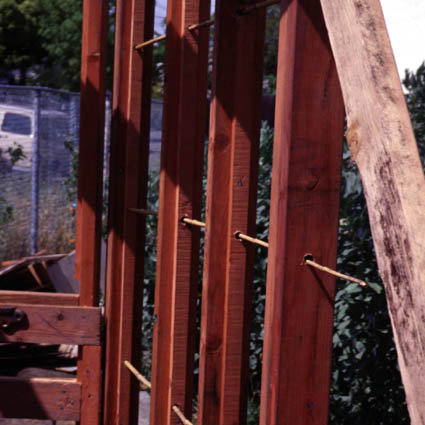
Put a used large window and wood frames on the outside of the paired 8 holes of the wall. This box and the holes is a heating and air circulating system using solar energy. |
Blue Windows
Beautiful blue windows were made from used bins. This is the steps before the fragments of the bins were put into an oven.
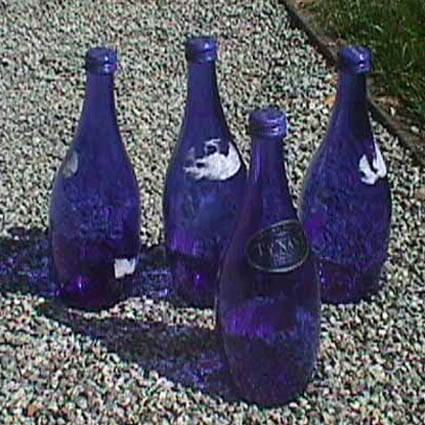 |
Prepare bins of a favorite color. | ||
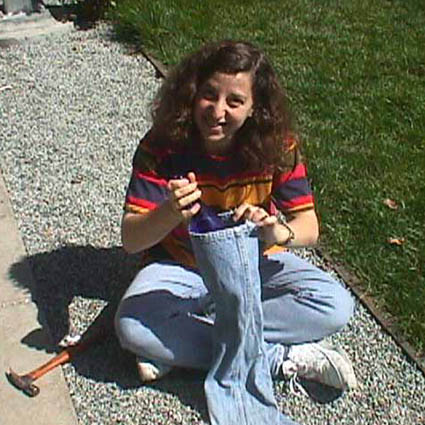 |
Put a bin in the sack of used pants. | ||
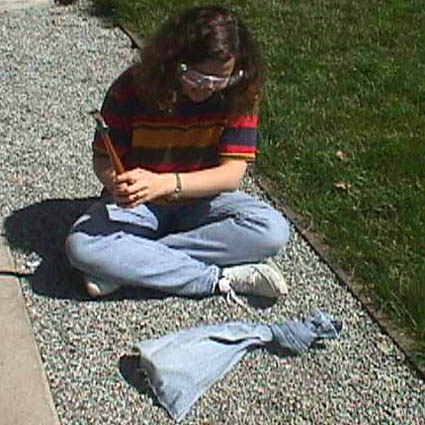 |
Wear a protection gogle and crack the bin by a hammer. | ||
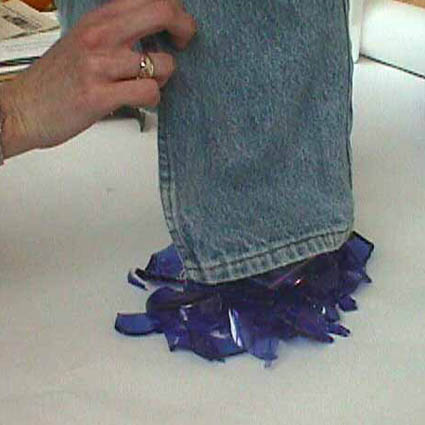 |
Cracked pieces of the blue bin | ||
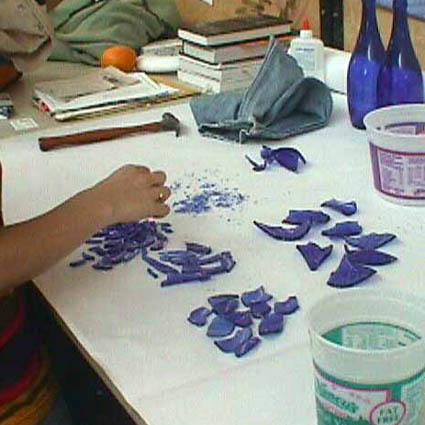 |
Arrange the pieces to decide the final layout. |
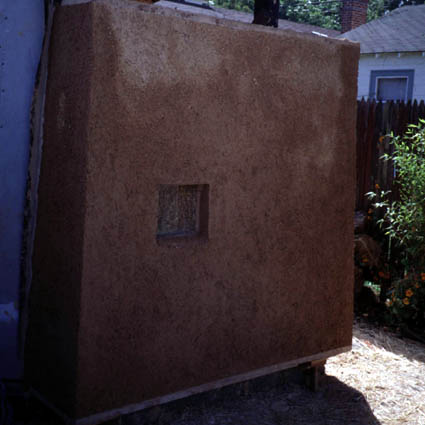
The Tool Shed
The tool shed was built on a vacant lot. Look at the brief record of the tool shed!
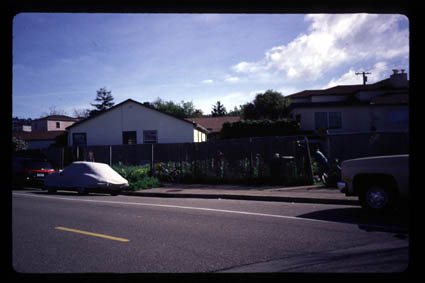 |
Winter 2000. Before the construction started. |
||
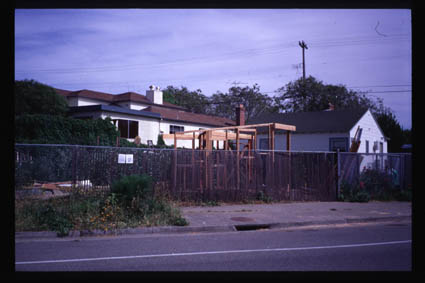 |
Spring 2000. The framework was gradually made up. |
||
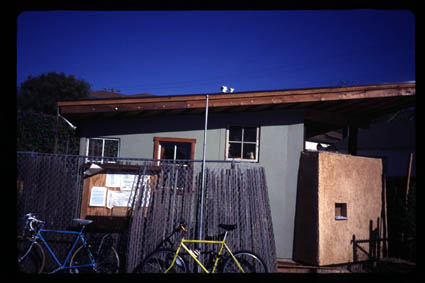 |
October 2000. The roof and the walls were nearly finished. |
||
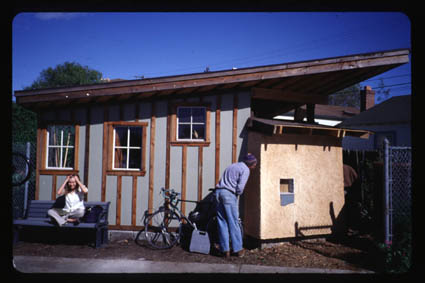 |
April 20001. The fence in front of the tool shed was relocated. A gate and a bench were installed. |
||
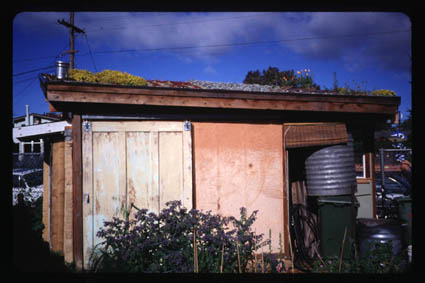 |
Another shot from the back side in April 2001. A big sliding door which was found out at a recycling shop was hanged. |
June 2001, I graduated the school and had to come back to Japan without looking at the completion of many plans such as the drainage system, the photovolitaic generation system and so on. It's my small pleasure to imagine the EcoHouse of the 10- or 20-year future. I am looking forward to going sometime back to EcoHouse to see the progress.
To Berkeley EcoHouse official homepage
Copyright by Junichi Imanishi.
Last updated on May 20, 2002